Archive for Cooking Gear

What Is Glamping?

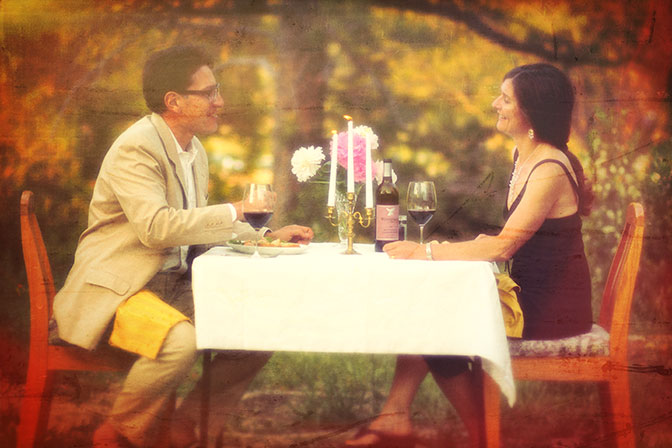
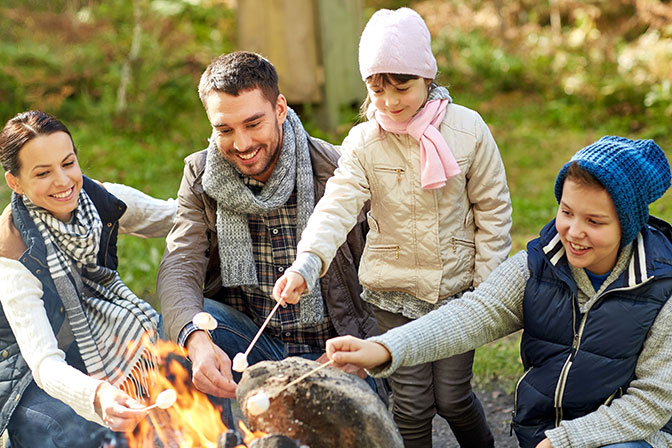
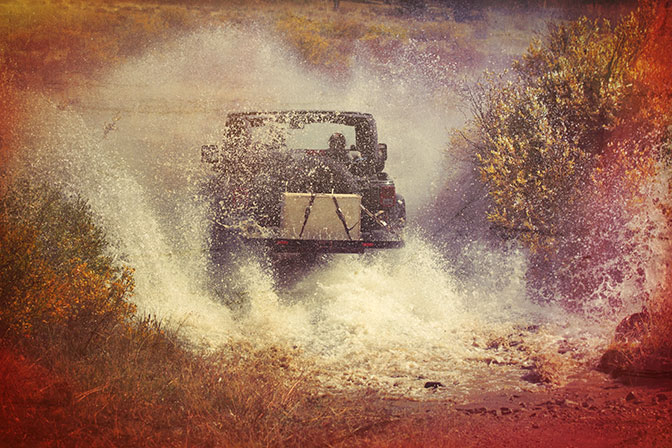
Do you want to camp in luxury? Let’s go glamping!

Glamping emphasizes ease and luxury while camping. It’s about enjoying the outdoors with less hassle. While a fairly new phenomenon, glamping is fast growing in popularity.

You can glamp in luxury tents, yurts, tree houses, or even teepees, usually cozied up in a framed bed with plush linen and comforters. Often meals are provided at an additional cost. You get to be one with nature without the hassles of setting up camp, sleeping on the ground, and using outhouses. One of the most comprehensive websites for glamping destinations worldwide is Glamping Hub.

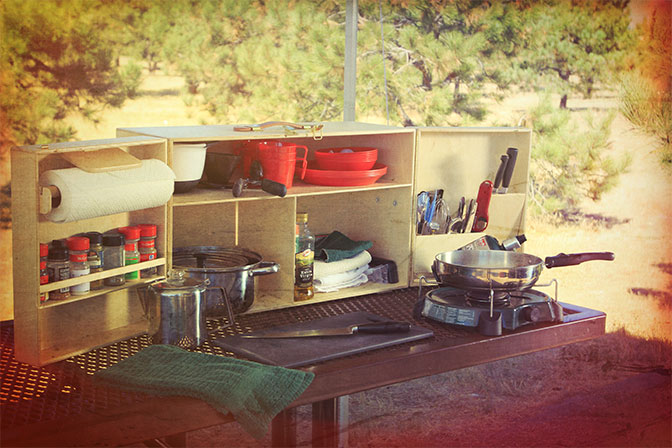
With the right gear, it’s not hard to create your own glamping experience

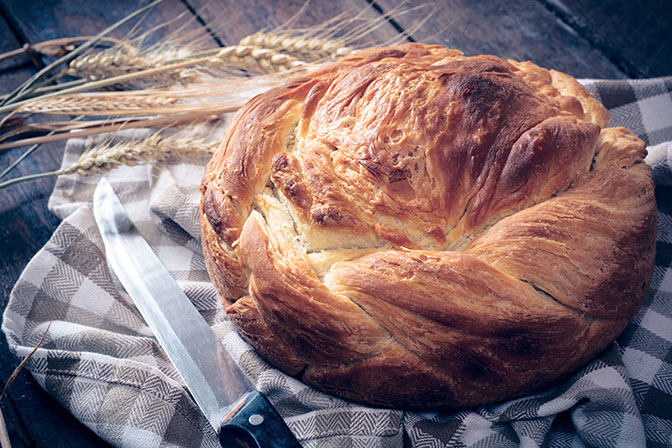
By having the right gear, you can make your own camping experiences more luxurious while enjoying the freedom to go where you want to go. You can create your glamping experience in your favorite national or state forest or even your backyard. How fancy or glamorous you make it is up to you. It does not have to be difficult or costly, but to really enjoy yourself, you will need top-notch cooking gear.
My Camp Kitchen Summit with Cooking Gear

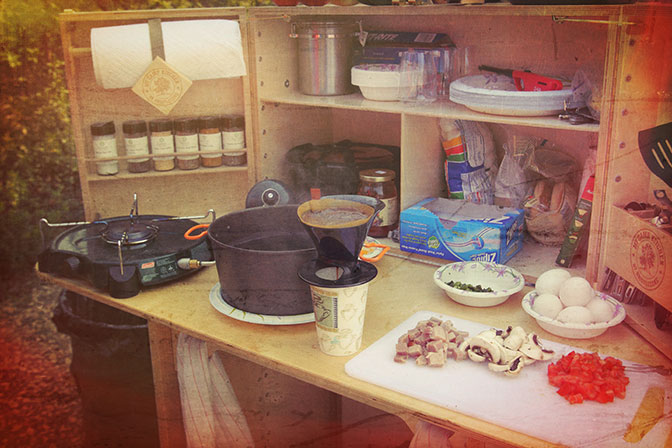
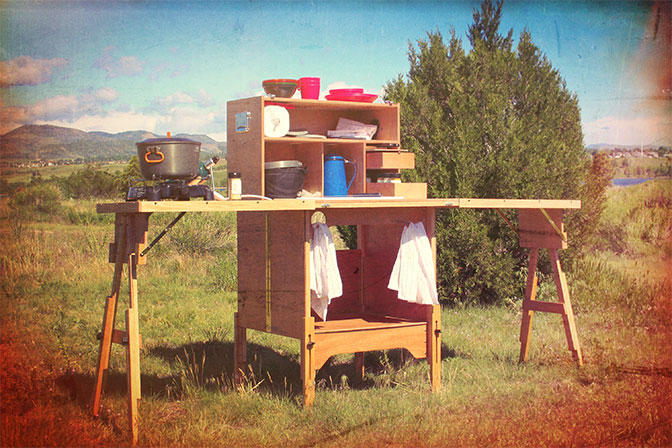
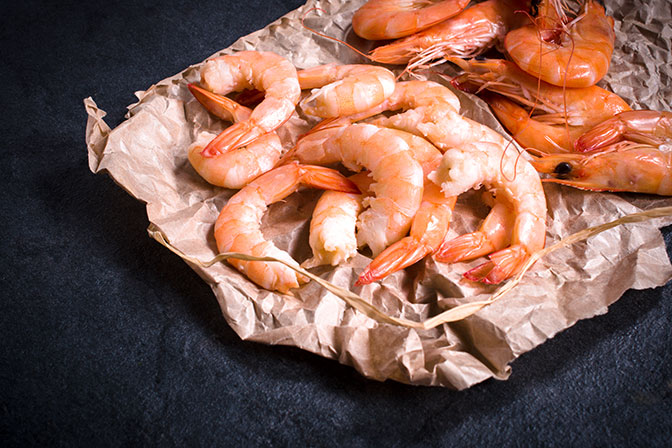
My Camp Kitchen provides the perfect glamping kitchen

We have several camp kitchens that make cooking outdoors easier and more comfortable. Our kitchens are crafted for ease of set-up and use. With the strength and beauty of hardwoods, classic joinery, and sturdy hardware, they are built to last. If you are looking for a more deluxe version, then you should consider our Summit.

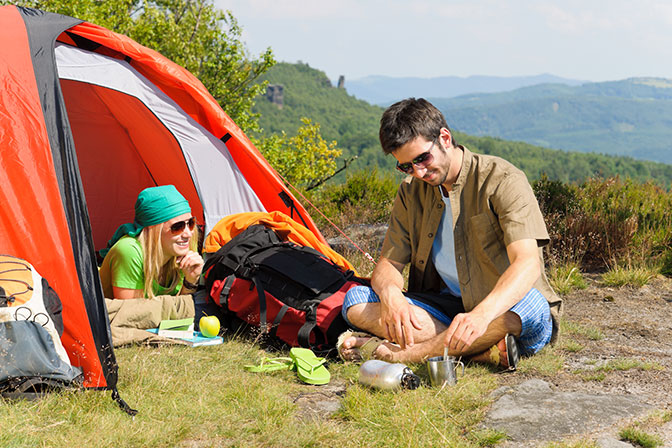
Enjoy glamping outdoors in style and comfort

Check out our full line of My Camp Kitchen outdoor cooking products.

8 Must-Have Tools for Camp Cooking

Who says you can’t cook while camping? As long as you have the right tools, preparing a delicious gourmet meal out in the woods is easy! Before your next trip, make sure you have these eight tools for camp cooking.

1. A camp stove

Not every meal has to be grilled or prepared using a stick. There are plenty of camp stoves available that are lightweight and easy to pack.

2. Pots and pans

If you’re going to bring a stove, you’ll need some pots and pans, too!

3. Knife

This can be forgotten easily. When packing your knife, make sure you put a plastic cover over the blade for protection.

4. Spatula

Bring along a spatula that can handle both heavy and lightweight foods. That way you can use the same spatula while cooking your steak and potatoes.

5. Portable camp kitchen

You’ll need a place to store your kitchen items and prepare food. Pack a portable kitchen to make camp cooking a breeze.

6. Can opener

It would be frustrating to bring cans of beans and vegetables and then not be able to open them!

7. Headlamp

If you’re preparing a late-night meal, a headlamp can help you see so you avoid injury. It’s a lot more convenient than trying to hold a flashlight.

8. Cleaning supplies

Before you prepare each meal, make sure your pots, knives, and spatulas are clean. When washing dishes, keep at least 200 feet away from the lake or river so you don’t impact the natural environment.

10 Tips for a Successful Camp-Out

  1. Personal gear. Pack your gear in a soft duffel bag or backpack. Take what you need—and no more! Stow gear in your tent and keep it tidy. Check the weather before leaving, and be sure to bring the proper clothing.
  2. Stay level and safe. Choose a level spot for pitching your tent. Make sure there are no signs of little streams running through your tent site from previous rainstorms. Check overhead to confirm there are no dead trees or large branches that can fall on your site.
  3. Cooking gear. The biggest mistake some campers make is bringing the kitchen sink. All you need is a portable camp kitchen that holds enough gear for a family of two to six. Like the personal gear, take what you need and no more!
  4. Plan your meals. If you have a camp kitchen or a makeshift set-up on a table, plan your meals around the cooking gear you are going to use. Only refrigerate items that require it. Try to use as many fresh foods that don’t require refrigeration as you can in your menu.
  5. Keep dry or in the shade. A dining fly or “Easy-up” is quite handy. If it rains, your area is protected; if there is a lot of direct sun, you can enjoy shade. It’s also a great place to put your kitchen.
  6. Kitchen hang-out. Just like at home, the kitchen is a hangout for socializing. Keep it neat with the coffee pot on.
  7. Manage your trash. It accumulates quickly. Bring heavy-duty trash bags. A collapsible trash container with the trash bag works great. If you are in a place with campfires, burn all of the paper goods (not plastics).
  8. Clean your room. Remember what your mother said, “You can’t go out until you clean your room.” Keep your tent tidy and organized so when it’s time to “hit the sack,” you can jump right in.
  9. Fires and firewood. Know the campfire regulations for your campsite. In heavily used areas, gathering wood is not permitted, so you may need to bring your own.
  10. Camping is a time to relax. Enjoy the natural environment—and keep it enjoyable for the next camper to follow. Be courteous and don’t trash your campsite.

Camping Checklist: What to Pack on Your Next Camping Trip

When it comes to camping, preparation is a necessity. To help you pack for your big trip, we’ve compiled a camping checklist full of must-have items you won’t want to forget. Bear in mind these items will differ depending on factors like the season or number of people going, so make adjustments accordingly.

Clothing

When packing clothes, keep comfort and protection in mind. While you may enjoy wearing flip-flops at the beach, you will definitely want a pair of tennis shoes for hikes or long walks.

Essential clothing items include:
  • Tennis shoes/hiking boots
  • Sandals
  • Jeans
  • Shorts
  • T-shirts
  • Socks (bring extra)
  • Sun hat
  • Sweatshirt/jacket
  • Rain jacket
  • Underwear (bring extra)
  • Swimsuit
  • Towels

Cooking

Instead of just packing a bunch of food and hoping for the best, plan out your meals beforehand. That way, you will know exactly which ingredients and supplies to pack.

Cooking items you will want to bring include:
  • Water
  • Ingredients and food to make all of the meals you planned
  • Cooking supplies you will need to make your meals (stove, pots, etc.)
  • Portable countertop/storage cabinets (My Camp Kitchen offers portable kitchens to keep your cooking supplies organized)
  • Plates, utensils, cups, and napkins
  • Firewood
  • Charcoal
  • Marshmallow sticks
  • Coolers and ice
  • Garbage bags

Personal Items

While you might not get to enjoy the luxuries of everyday life, you still want to bring the basic necessities to make your trip a pleasant one.

Personal items you might want to consider packing include:
  • Sunscreen
  • First-aid kit
  • Insect repellent
  • Hand sanitizer
  • Toiletries
  • Camera
  • Personal medications
  • Phone
  • Flashlight/lantern
  • Activity items (fishing poles, games, etc.)
  • Tools

Bedding

Are you sleeping in a camper, or do you plan to stay in a tent? Make sure you’re adequately prepared to sleep comfortably no matter what type of shelter you’re planning to camp in.

Items you could bring include:
  • Sleeping bag
  • Sheets
  • Blankets/comforters
  • Pillows
  • Air mattress and air pump

Navigation

It’s easy to get lost when you’re camping in unfamiliar territory.

Make sure to include these items when you pack:
  • GPS
  • Compass
  • Map

Be prepared for anything on your next camping trip. Packing the necessities will ensure a much smoother and more enjoyable time for everyone!

For more information on how to camp, check out our other posts:

How to Camp: Top 5 Tips for Camping

Swimming in the lake, roasting marshmallows, playing games—what’s not to love about camping? Camping can be ridiculously fun and is a great way to spend quality time with friends and family. To enjoy your trip as much as possible, you should carefully prepare beforehand. If you’re new to camping and aren’t sure how to plan for your camping trip, here are five basic how-to-camp tips that will help make your adventure stress-free.

1. Bring a first-aid kit

Whether you’re out in the middle of nowhere or spending time in a nice, familiar campground, you will want to bring a first-aid kit. Some of the items you should include are prescriptions, Band-Aids, aspirin, antiseptic creams, ointments, sterile wipes, rinse solutions, tweezers, and scissors.

2. Plan activities

More than likely, you’ll have plenty of free time on your camping trip. Fill up those hours where you have nothing planned with a fun game or group activity! Cards are perfect because they don’t take up a lot of space and you can use them to play a variety of different games. Other activities you might consider include swimming, hiking, and canoeing.

3. Pack lightly

People tend to overpack, thinking they are playing it safe. They regret that decision once their camper feels way too crowded. Pack only the essentials, but make sure you are prepared for both warm days and cold nights.

4. Plan out each meal

Planning meals ahead of time will prevent you from running out of food or packing too much. Take into account that some people on your trip may want seconds or even thirds.

5. Always pack bug spray and sunscreen

Out of all the miscellaneous items you pack for your camping trip, you’ll be most grateful for your bug spray and sunscreen. Find a bug spray that contains 20 percent or more DEET and be sure your sunscreen has at least 30 SPF.

Being prepared is an essential part of camping. Follow these five camping tips and make your trip an experience you’ll cherish forever!

For more information on how to camp, check out our other posts:

Daily Bread

We just started partnering with Daily Bread, a company committed to promoting sustainable living and emergency preparedness. Below are some quick tips from them.

5 easy ways to start your food storage

by Dirk Puckett

Building up your family food storage is a wonderful idea—but if you haven’t started yet, it’s likely that you feel overwhelmed about where to start and how much to spend. Getting started with food storage can be easy and inexpensive if you use common sense and plan ahead. When you break the process down into manageable steps, you’ll soon be on your way to having a versatile, long-lasting emergency family food supply to sustain you during hard times.

Here are 5 easy ways to start your family food storage:

1. Make a list

Forget freeze-dried gourmet dinners and focus on simple, practical food items you can find at the supermarket that are high in nutrients and store well. Focus on versatile, tasty foods like pasta, rice, dried beans, canned meat, pancake mix, peanut butter, canned fruits and vegetables, nuts, and powdered drink mixes. The food items on your list also need to be things your family will actually eat. Don’t make plans to store canned lima beans if you know your children will never eat them. Then, consolidate your list to just 12 to 15 items. Once you’ve built up a basic food storage supply, you can expand on it.

2. Set a budget

Look carefully at your grocery budget and see how much you can divert to building up your food storage. Even with as little as $10 per month, you can get started. Over time, you’ll build up enough to help you and your family out in a crisis. Another good idea is to save up all your spare change during the month and put it toward your food storage budget. Even a little bit of change can generally cover an extra can of tuna fish or a bag of hard candy every month.

3. Buy a little at a time

Once you have a list and a budget, you can begin to purchase a few food items every time you go to the grocery store. Whenever you shop, add some of the food storage items to your cart. Don’t forget to take advantage of the sales on your food storage items, such as two-for-one sales or loss leaders.

4. Set up a purchase schedule

If your food storage items are not on sale, keep organized by setting up a purchasing schedule for your list of items. For example, if you have $15 to spend each month, start by buying a 5-lb. bag of rice, a 5-lb. bag of beans, and three cans of tuna fish. The next month, choose three more things on your list to buy. Keep purchasing until you’ve gotten some of everything on your list, then start over. This way, you’ll have a variety of foods in your storage, rather than too much of one item.

5. Designate storage space

It doesn’t take long for even a basic food storage supply to grow bigger than you thought. Get creative when it comes to storing your food and look beyond the obvious. If you aren’t lucky enough to have empty shelves in the garage or basement, make room elsewhere. Try adding a bookshelf in the closet of the spare room, stacking totes under the stairs, or getting long, flat containers that fit under your bed.

Dirk Puckett writes about food storage, emergency preparedness, and self-sustainable living for Daily Bread.

So You Think Outdoor Cooking and Culinarians Don’t Mix … Read On

I love to cook, and I love being outdoors. With My Camp Kitchen products, you will feel like you have a kitchen outside (literally everything but the kitchen sink). Imagine how easy standing upright at a countertop with ample workspace would make outdoor cooking. Now picture a closable cabinet behind this workspace that literally holds everything you would need to cook and serve a great meal. That’s right—pots and pans, Coleman stove, utensils, spices, oils, dishes, cutting board, paper towels, cups, wine glasses … and so much more. Now imagine this next to your grill. No more hot dogs! What are you going to cook?

So You’re Wondering What a Chuck Box Is?

I can’t tell you how many times I have heard from people seeing our products for the first time, “Wow, I remember when my grandfather built one of these for camping. My brother (or sister, or aunt, or … ) still uses it today.” That, in an nutshell, is a chuck box: a kitchen cabinet made of solid wood (historically heavy plywood) and built to last through the generations.

The My Camp Kitchen Summit and Outdoorsman are the chuck boxes of your dreams. We build them with Baltic Birch plywood, which is very lightweight while maintaining its strength. It is also beautiful, with a gorgeous golden grain. We use brass and zinc-plated hardware, creating a sleek and high-quality look. Our kitchens are built to be passed on from generation to generation.

A Camp Kitchen Built for Rugged Overlander Conditions

We tried to break it! And I mean we really tried. My friend Johnny was kind enough to do the honors.

We have a favorite campsite in the Rockies up above the town of Como, Colorado. There is a great four-wheel drive trail in the mountains just beyond the campsite. This is where we took the Outdoorsman for a ride. You can watch the video at our Videos page.

The Outdoorsman was packed with the normal gear we use on camping trips. This includes a single-burner propane stove, a small propane lantern, a couple of propane canisters, a pot and pan set, utensils, silverware, savory spices, extra-virgin olive oil, balsamic vinegar, paper towels, plates, cups, a Henkel knife set, a number of nonperishable food items, and a bottle of wine.

Sunday morning, Johnny showed up bright and early along with Herb, Matt, and Sarah (three of my kids); John, our videographer and my nephew; my brother Dorraine and his wife, Ruth; and Mike, a good friend from Canada. We packed up the Outdoorsman and strapped it onto the hitch platform Johnny uses to tote extra gear on his Jeep. Herb drove his SUV with John and his video gear. Herb opened the sunroof on his SUV, and John stood on the seat with half of his body and camera outside.

The first couple of miles is a modest gravel road, then we turn off onto a US Forest Service four-wheel drive road. This is when the fun really began. Johnny loves speed and rough rides, so he was right at home going as fast as he could over the rocks and rough terrain and through many water crossings. From the point at which we started on the FS road, it is about 10 miles to the continental divide overlooking Breckenridge. My brother, five years my senior, drove Sarah’s truck to the divide—a major feat for someone who doesn’t like to drive. He’s no wimp, that’s for sure.

Neither was the Outdoorsman. It was exposed to it all—dust, water, and a rough beating. You have to see the video to appreciate it.

After reaching the summit, we paused for a breather and took photos of the spectacular views. Then we headed back down just below tree line to our favorite campsite.

It was then that we set up and opened the Outdoorsman and found everything was intact!! Nothing broke, and it was dry inside despite all of the water it had been exposed to. Some dust did find its way in, but nothing that got in the way of cooking a great meal. I was very pleased.

We certainly don’t recommend such abuse on a regular basis, but taking the Outdoorsman four-wheeling with sane drivers is a piece of cake.

My sincerest thanks to everyone who tried so hard to break my kitchen.

Happy camping and cooking,

Richard

You, Too, Can Cook Gourmet Meals While Camping

Yep, it’s easier than you think with the right gear, and of course, a Summit or Outdoorsman helps tremendously. This past summer while camping here in Colorado, we made a video of my dad, Richard, making Soused Shrimp (aka Shrimp Scampi) with a twist. You’ll find the recipe on our Videos page. Enjoy!